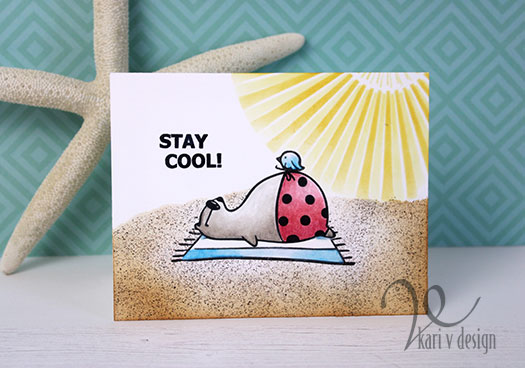
Hello! Today it was 120 degrees (Farenheit) here in Arizona, and I really wish I was at the beach! So I decided to share a simple beach card I created with a VIDEO. This is a card I created a while ago, but have never shared the video on my channel.
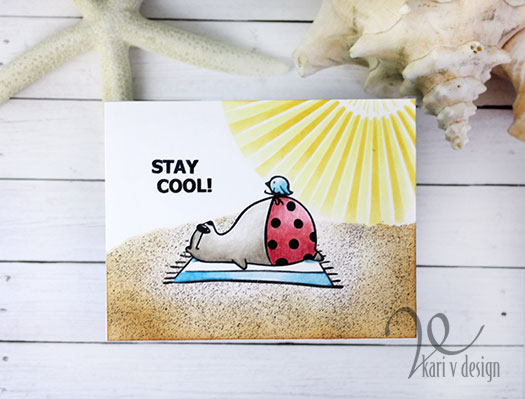
Wishing I was on that beach right now!
Doesn’t Big Bear look so happy on the beach?!
I hope you enjoy!
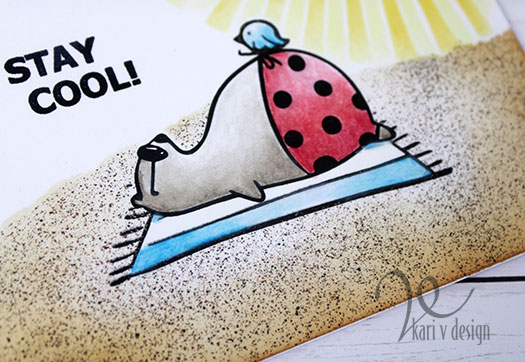
Look at that sandy beach! This technique is STILL a favorite way to create realistic sand granules for a beach scene. Check it out and let me know if you’ve tried it before?
Looks like real sand granules!
I also share a colored pencil technique to get a smooth blend. This is another favorite technique when I am using colored pencils.
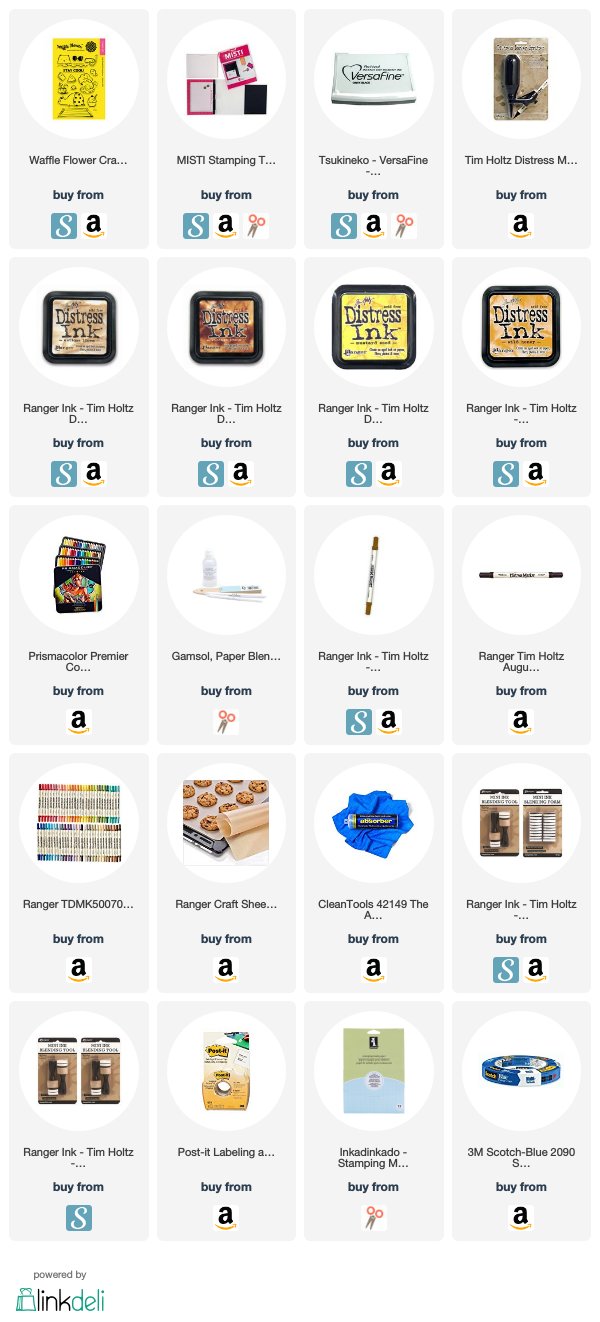
I’m often asked what supplies I’ve used, so I created a list for you here, using affiliate links when possible. When you purchase using these links, I may receive a small commission. This helps me keep up with blog costs and continue to bring you fun projects like this one! Thank you so much for your support!
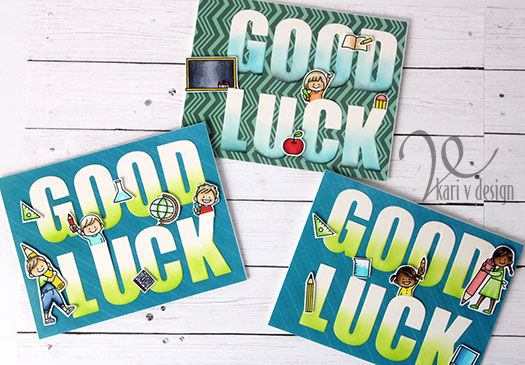
Hello! It’s Back to School week for our kiddos here and I have some quick cards to share. When I put together cards for kids, I try to remember that they are kids and really don’t care how much time or effort that goes into making a card. So that means, something quick but still cute!
Enter some stamp and die elements that are cute AND will fill the entire card.
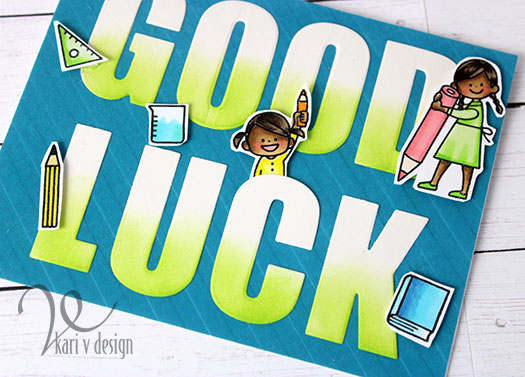
I stamped every single image from this Waffle Flower set and colored them in quickly with my Copic markers.
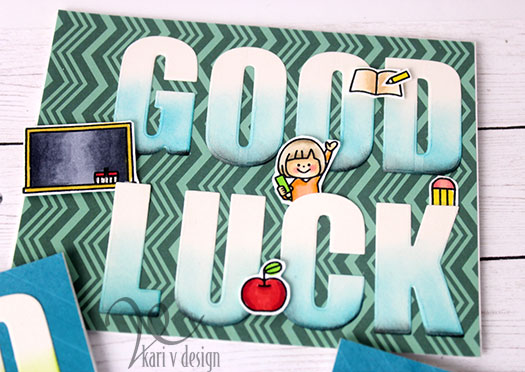
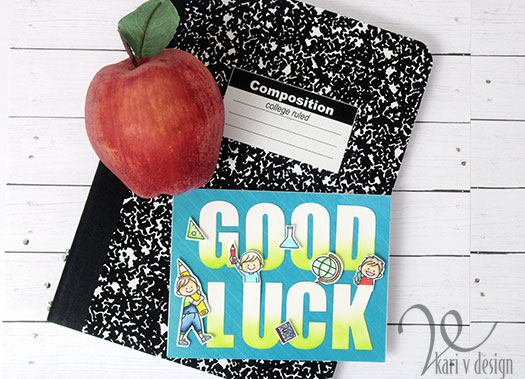
Then, I die cut the large alphabet dies to spell “Good Luck” from cream colored 110# cardstock. To add some punch, I added some ink with finger daubers on the lower part of the letters.
Back to School!
I used patterned paper for the card panel to add some extra texture, and adhered the letters on with liquid glue. Then I popped up the images with foam tape.
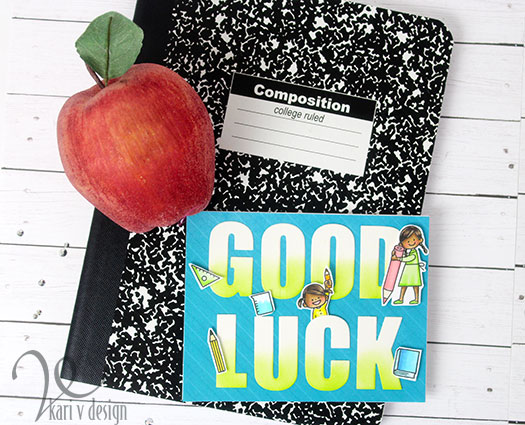
A fun card and easy to put together. I’m pretty sure my nephews and granddaughters will love them! But I think they will love the “smarties” candies that I’m giving them to go along with the card. Lol.
I’m often asked what supplies I’ve used, so I have a list below using affiliate links, when possible. When you purchase using these links, I may receive a small commission. This helps me to keep up with blog costs and continue to bring you fun projects. Thank you so much!
I hope you enjoyed these back to school cards today! If you have kids/grandkids going back to school, I wish them Good Luck!
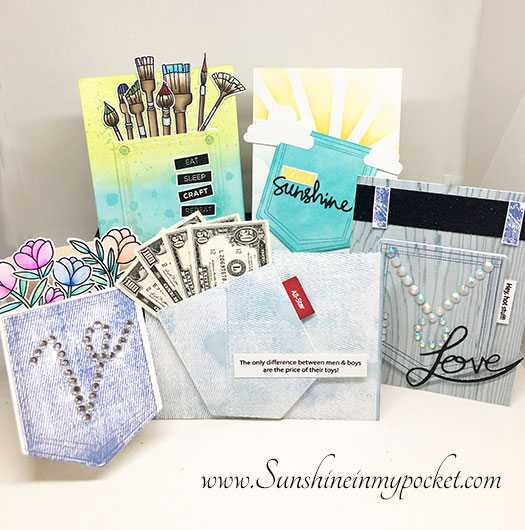
Hello! Today I couldn’t stop making pocket cards with the June 2018 Hedgehog Hollow box! I made 5 cards to share today. Yes, FIVE! I just kept on going (and I still have a dozen more ideas for this versatile box)! Even though this is a masculine themed box, there is still potential for feminine cards, too.
Affiliate links are used when possible, when you click on these links and purchase a product, I will receive a small commission. These help to pay for my blog and crafty news that I bring to you! Thank you for your love and support.
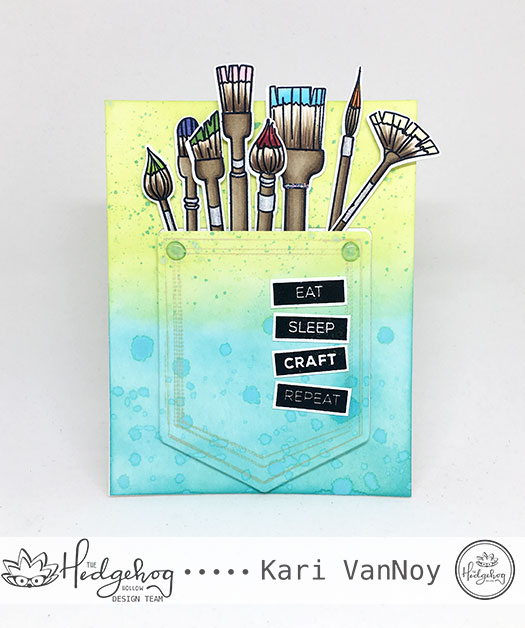
The first one could be for any crafty friend, and I splattered it with a little paint and added some paintbrushes from my stash.
I used Distress Oxides in Peacock Feathers and Twisted Citron to ink up a card panel before cutting out the pocket die. Then I added my brushes and popped it all up using my favorite Scotch 3M foam tape. I added a sentiment that says “Eat. Sleep. Craft. Repeat.”
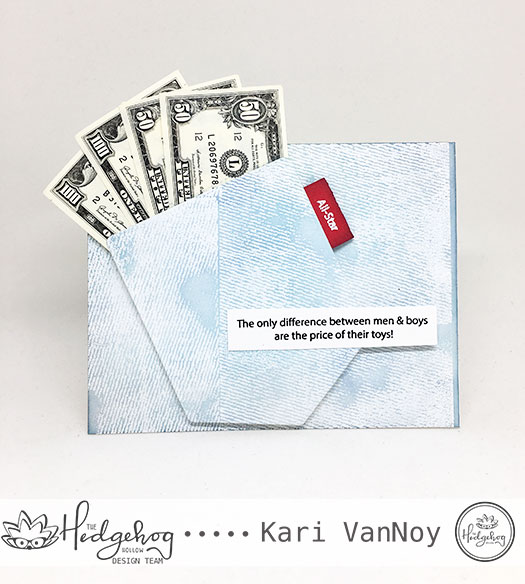
The next card I made just HAD to have some money sticking out of it. Because after all, what do you put in your pocket? My favorite is when I put a twenty dollar bill in my pocket and forget about it…then I find it when I wear those pants again! (do you ever do that, is it just me?)
I used the sentiments from the Hedgehog Hollow stamp sets in the June box: “The only difference between men & boys are the price of their toys!” Then I used “all-star” as a red tag on that pocket….to kind of resemble the “Levis” tag on a pair of jeans. Believe it or not, I FOUND this paper money just floating around in my craft room. Perfect!
Here I just inked up the background with a little Distress Oxide in Faded Jeans, then I stamped on the denim stamp with the same Distress Oxide ink. So easy, but it adds a lot of texture!
My next card had to be a pocket with BLING!!
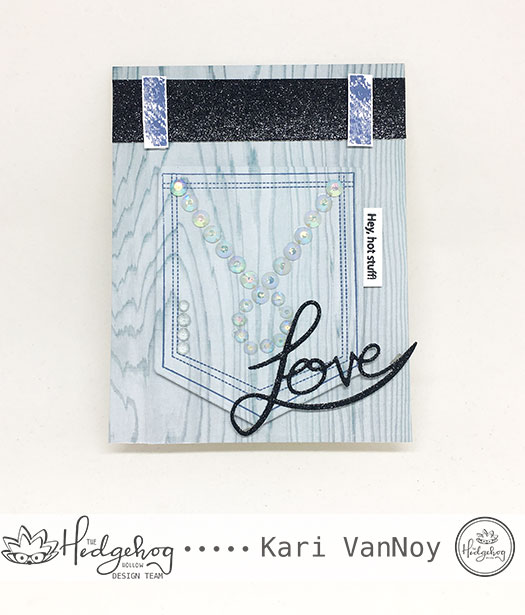
So I created a pattern with some gemstones on the pocket. The woodgrain paper was also in the box. Who ever heard of wood grain pants?! But I kinda liked the look, so I went with it. I created a glittery belt out of black glitter paper and added some “belt loops” with the stamp set. The “Love” die is from this set and is a part of the Crafting for a Cure bundle to raise money for the Akron Children’s hospital. (I love that Alexandra did this set!)
For the tag on the side of this pocket, I used “hey hot stuff!” and I think it works perfectly for a girl card.
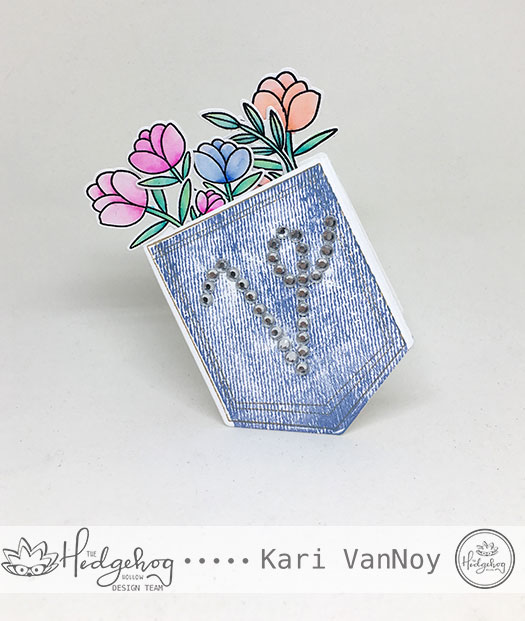
Now, I just couldn’t go on until I made a pocket SHAPED card! Again, I used gem stones for the pocket. But this time I cut the pocket out and left the top portion over the fold in the card, so it created a POCKET SHAPED card! So cool.
I added some flowers that I had colored up with my Zigs, then I covered the back of the card with another pocket die to hide the glue. On the inside it says “Sending Joy.” (see the video for a better look)
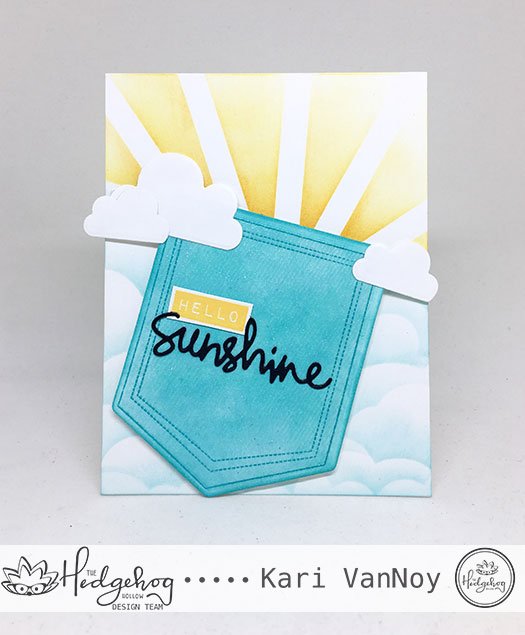
Now, for my last card, you just KNOW I had to make a Sunshine in My Pocket card! I mean, c’mon…it’s the name of my BLOG!
The sentiment says “Hello, Sunshine” and I used some products from my stash to create it. I taped off the sunshine coming out of the pocket with post-it, then I used Distress Ink in Mustard Seed and Wild Honey to ink on those sun rays! The pocket is inked up with Distress Oxide in Peacock Feathers, then I used the denim stamp with Versamark and added clear embossing powder for texture.
Check out my video for more details here or on YouTube:
I hope you had as much fun as me and got some inspiration for your own pocket cards! Here’s one more look at them all together!
Hello and good day to you! Today I have a delicious chocolatey post for you…well, it’s a CARD so please don’t try to eat this one. Lol.
I’m using supplies from the May Hedgehog Hollow kit, which included these beautiful Waffle Flower images and a die designed from the Hedgehog Hollow creator herself! This is a card that has been in my head ever since I was out of town and as soon as I got home, I created it right away.
[Affiliate links are used where possible at no additional cost to you, thank you for your love for my site!]
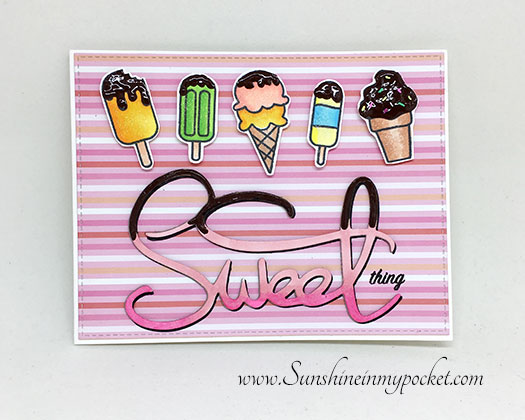
I added a “Chocolate” drizzle to all the sweets and I just love how it turned out:
That “chocolate drizzle” is so fun and shiny that it was difficult to capture it in a photo! But look at that shine! I even added the “chocolate” to the Sweet die cut! (see below for what I used to “make” that chocolate). The cute striped paper is from the March HH subscription box, which is sold out.
Now if you brought me all these treats I might just declare “Well, aren’t you a sweet thing?!” That’s the reason I decided to use this sentiment.
If you haven’t seen the contents of this box, click here to view my unboxing! It’s a fantastic subscription box and I love each of them I’ve received so far!! And here’s the first card I made with the supplies in the box, too!
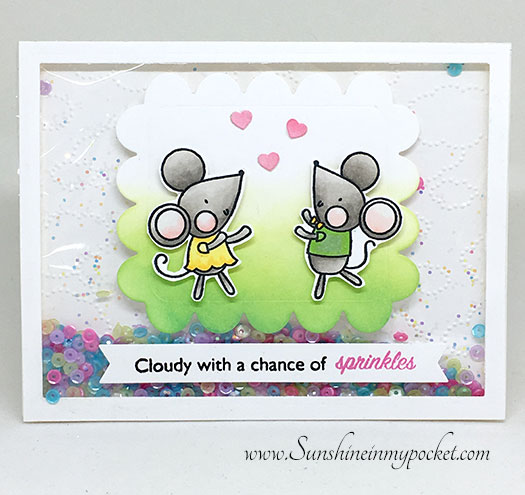
Another card that has been waiting for creation is this shaker card:
This entire card is a shaker! I embossed some clouds in the background then colored up those cute mice that are included in the box, and added those Pretty Pink Posh sequins from the box! This shaker card really has a fun sound when you shake it!
The sentiment is also included in the box, it’s the new sentiment set also designed by Alexandra! I just love all the options she gives for sentiments! I stamped the first portion in black ink, then the “sprinkles” I stamped using Distress Oxide raspberry ink. The background for the little mice was inked using Distress Oxide ink as well in Twisted Citron and Lucky Clover.
Such fun! I hope your day is full of sprinkles, too. See you next time!
For more information about the Hedgehog Hollow subscription boxes, visit the website here. I love that you can buy just one box if you want, or sign up for the subscription so you don’t miss a thing.
Oh, and if you were looking for how I made the “chocolate drizzle”….I used this pen:
Hello! I have some fun Halloween cards for you using the “Boo” set from Waffle Flower, featuring one of my favorite characters: Big Bear! I use mostly Distress Oxide Inks to create these backgrounds and I really had a lot of fun!
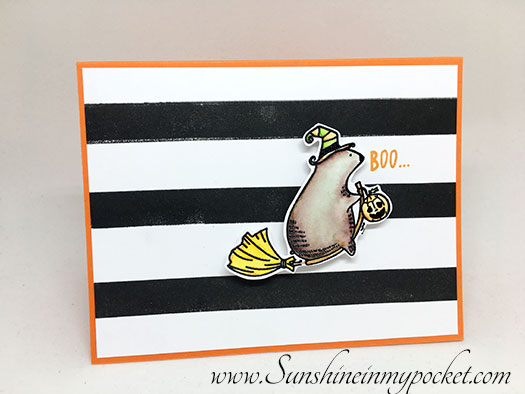
This first one is the simplest to make: just stamp some black stripes for the background, color up your bear and pop him up using Scotch 3M foam tape! (This is my favorite and I buy it in a big roll!) I used the Plaid Play set to stamp these stripes in VersaFine Onyx Black ink.
[Here I used Zig Clean Color Real Brush Markers to color the bear.] Then, I added the card panel to an orange card base, stamped the “Boo” sentiment in orange marmalade Distress Oxide ink and Voila! A cute Halloween card that didn’t take very long at all!
For the second card, I used the same stamp set, but got a very different look!
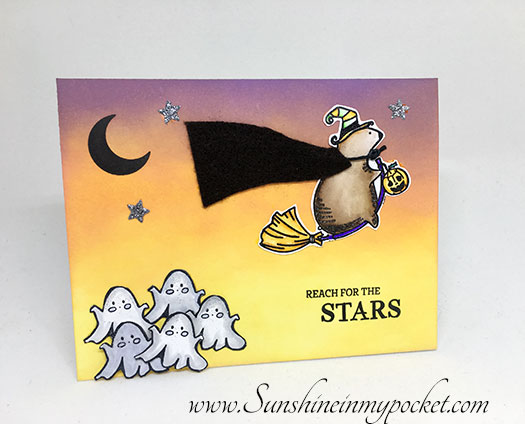
Oh, Big Bear, you look very cute with a cape! I just cut a small piece of felt in a “cape-like” shape and attached it to the car front using my favorite glue: Tombow Mono Multi glue. A little black twine tied in a knot makes it look like an official cape. Lol.
For the background, I used Distress Oxide Ink in Fossilized Amber, Spiced Marmalade, and Wilted Violet. (These are from the January 2017 Distress Oxide colors). I added some die cut stars in silver glitter paper, and a moon shape and sentiment from the Waffle Flower “Reach for the Stars” set.
I love those ghosts in the corner!
My third card uses Distress Oxide ink in Spiced Marmalade to make a puff of smoke behind Big Bear. I cut my own mask in a smoke shape using Post-It Full Adhesive sheets, then inked on the orange color. Add some sparkly Stickles and White dots to create a magical look.
The background is made with Distress Oxides in Broken China and Faded Jeans colors and splashed with water droplets. I masked the bear first before this ink went on…it’s an *almost* one layer card! The Boo sentiment is heat embossed in white on a black strip of cardstock and adhered to the upper left of the card. I like the black card base for this one.
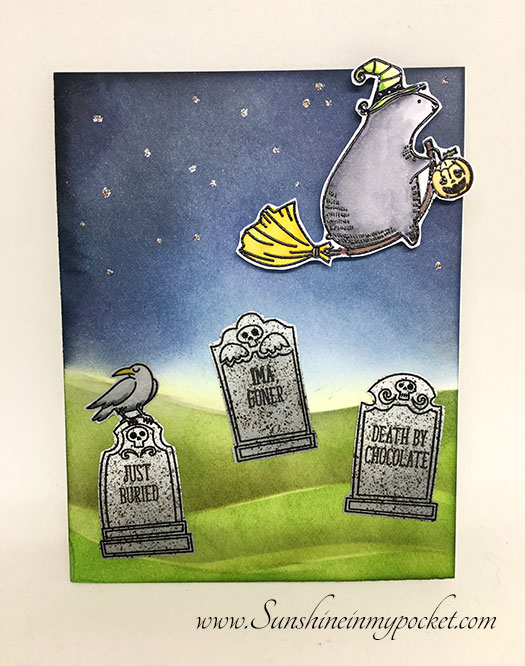
And my last card is one of my favorites…Big Bear flying over a graveyard!! (This grave stamp set is from My Favorite Things)
The Distress Oxides are wonderful for creating a background like this! I also inked on the gravestones using the Iced Spruce color. To get the granite-like texture on the gravestones, the Distress Spritzer is key! I used a few grey Distress Markers in the spritzer on the gravestones BEFORE I cut them out. Don’t they look cool?
For the stars in the sky, I used one of my favorite colors of Stickles: here. It creates a silvery/gold star in the sky! Just add some dots and they dry to a glittery perfection.
I hope you enjoyed these projects! I’d love to hear if you send out Halloween Cards. I have to say, that I don’t normally send Halloween cards, but when you have stamps as cute as these…now I love to make and send them!
Happy Halloween!
Affiliate links used when possible at no additional cost to you. Thank you for your support!
Hi I'm Kari. I'm a creator, a card maker, and a day maker! I am Lucky in love to a supportive husband, blessed to raise 3 kids (all moved away now!), and happy to be watched over by 2 dogs.
I originally started this blog to remind me to be happy amid adversity, and I hope it inspires you, too!