Archive | DIY RSS feed for this section
!his-card-packaging

Gift Card Set (for HIM)

Hello! I have a fun post today filled with masculine cards and a handmade box for gifting. This is perfect for this time of year or anytime you want a sweet handmade gift! I also have a more feminine gift card set…find it here.

This is a part of my Altenew Level 1 FINAL project! I chose to highlight three techniques that I learned throughout all the Level 1 courses:
1) Ink Blending
2) Adding Sparkle & Shine
3) Stencil Techniques
I use one, two or all three techniques in different ways on each card. Here’s a look at all six cards:
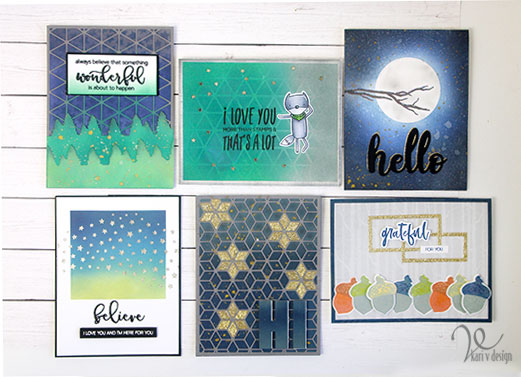
Here’s a look at all 6 cards!

I began choosing a color theme of Dark Blue, Green, and Gray and I started by ink blending some backgrounds and gathering some papers to support my theme. I have a video of all the cards, watch it here or on YouTube:

For my first card, I used the Altenew Layered Snowflakes Cover Die A cut with gray cardstock. I chose a dark blue and gray ink blended background I created and inlaid some of the snowflake stars with gold glitter paper (for the shine factor)! One of the tips in the ink blending course was to use a die cut sentiment in the same ink blended on the background. So I added the “HI” cut from the alpha dies in the same ink blended colors. I popped it up with white fun foam to set it apart.
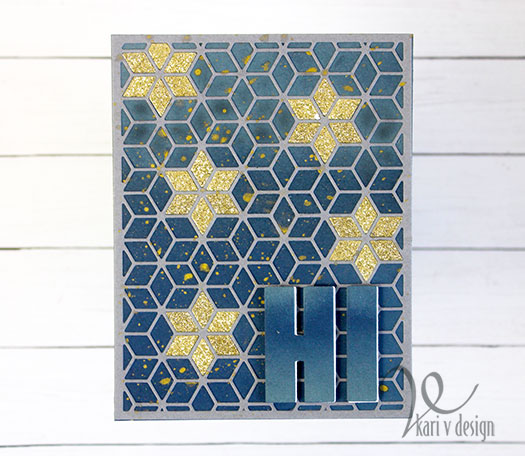
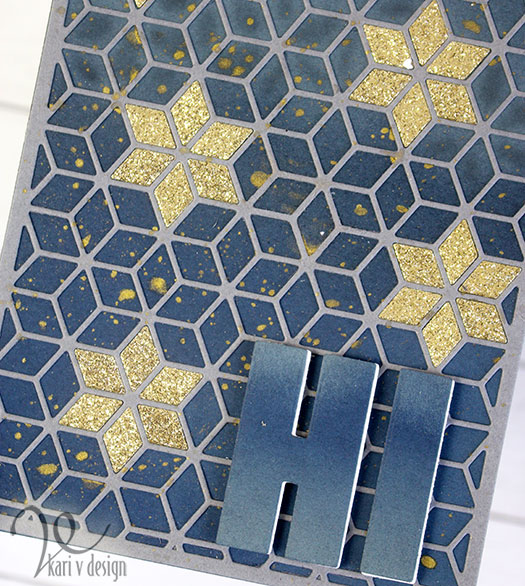
The gold watercolor ink splattered on the background creates another element of shine.

For my second card, I started by taping off a square onto my card that I could ink blend an evening dusk scene. Then I stamped the sentiment “believe” with black ink and clear heat embossed over it. (I did this so the black ink wouldn’t smear.) Then I used the new star stencil to add some Glacier Paste in the color Quicksilver.
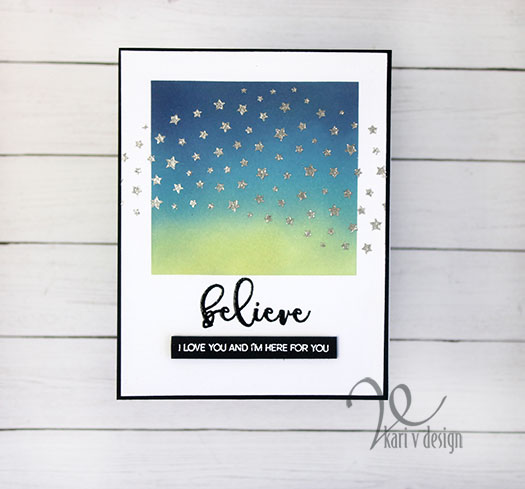
That Glacier Paste dries flat and shiny and really looks like foil! I added a sub-sentiment that I heat embossed in white on a black paper strip. I cut the panel down just a little to mat it all onto black paper and then onto the card base.

For the third card, I used a little trick taught by Carissa Wiley to create a frame using stacked die cut shapes. For this one, I cut glitter paper out of stacked rectangles to create a frame.
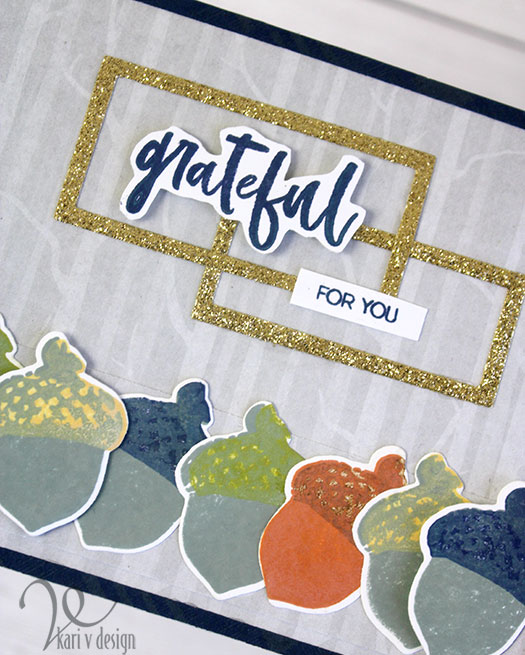
I stamped all the acorns using my color theme and stacked them onto some Altenew gray paper with birch trees. I fussy cut the grateful sentiment and popped it up with foam tape. I used a navy blue frame to finish it all off.

For the Fourth card, I used a die cut as a stencil…this is a great way to stretch your cover dies! This time I used the Snowflake Stars Cover die B as a stencil on this green inked background.
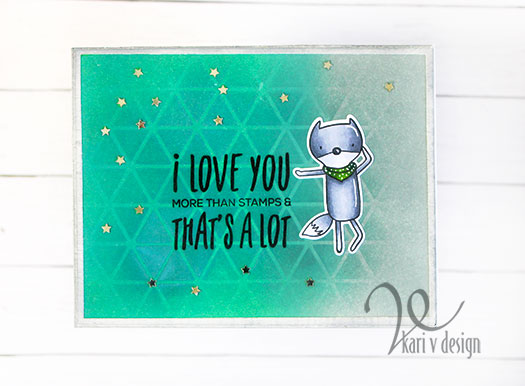
I added a sentiment, and a Copic colored Gray Fox. For the sparkle on this card, I sprinkled on some silver star sequins. This sentiment makes me smile!

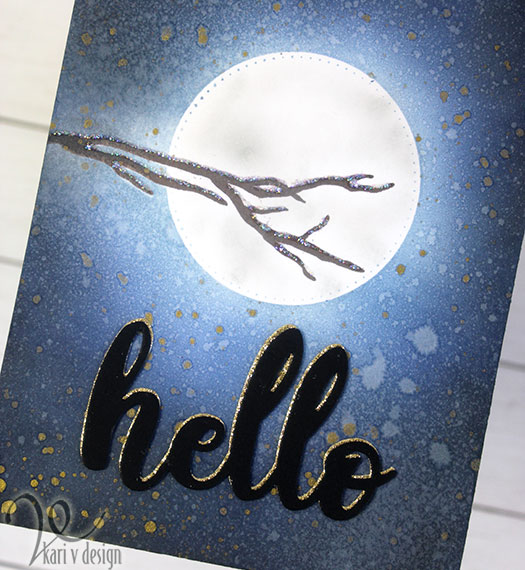
This next card is like a moonlight stroll! I masked off the branch (from the Winter Cardinal set) and a circle die before inking on some dark blue inks and black ink with makeup brushes. I continued to add light layers, building up the color each time.
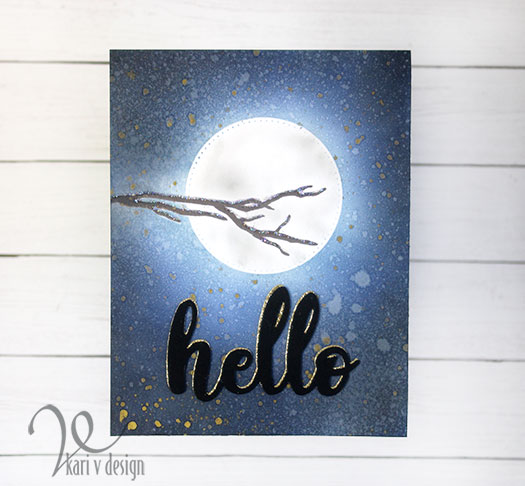
The moon has a glow around it!

Before I removed the masks, I added some splashes of water and gold watercolor. Once the masks were removed, I inked on some Weathered Wood Distress Oxide ink onto that moon to create the shadows. For extra shine, I used Stardust Stickles to add some ice to the branch…it sparkles in the moonlight!

The die cut Hello is cut in black and layered onto a gold die cut hello.
And finally…the last card features some die cut & layered evergreen trees, inked in green and splattered with metallic paint (both gold watercolor paint and Altenew metallic spray).
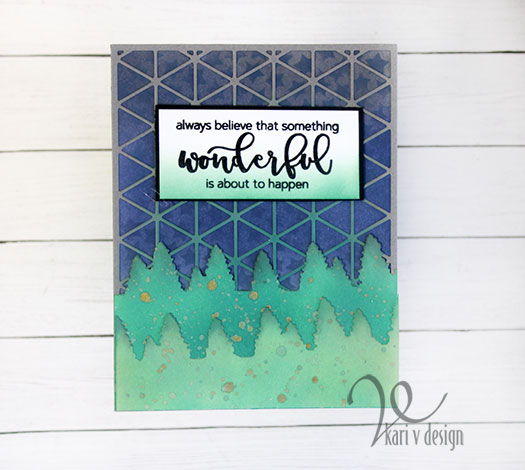
I used the cover plate die that I used earlier as a stencil! If you look closely, you might see the stars inked subtly on the background. I finished it off with a favorite sentiment of mine!

I have gathered together a list of all the supplies I used.

I’m often asked what supplies I use to make my cards and projects, so I’ve put together a list using affiliate links when possible. If you make a purchase with these links I may receive a small commission. These help me to keep up with blog costs and continue bringing you fun projects. Thank you so much for your support!

I hope you enjoyed this gift set of cards. I packaged it all up in this handmade card box:
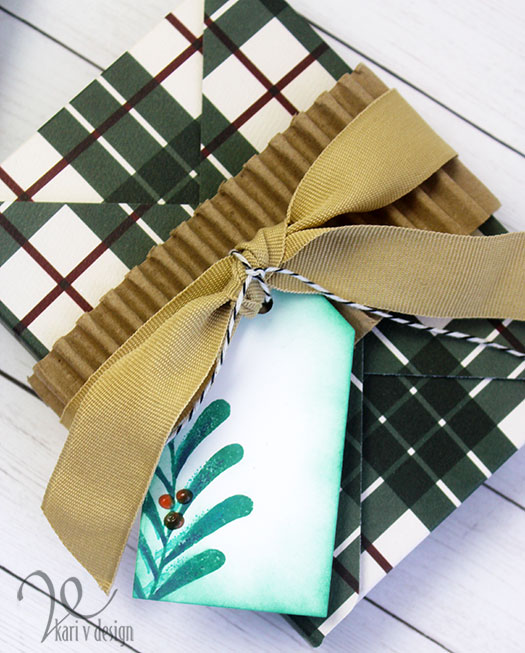
I created the tag using the Majestic Mistletoe stamp set. The corregated cardboard is recycled from packaging (that I’ve been saving because I loved it!) and the ribbon is also recycled from packaging…it was tied around a blanket. All I had to do was iron that ribbon and it looks good as new!

If you are interesting in making a gift card box, the instructions for the card box is in the beginning of my video for the feminine card set here.

Thanks so much for stopping by today!

Comments { 2 }
heart-pouch-with-markers

Sequin Sublimation

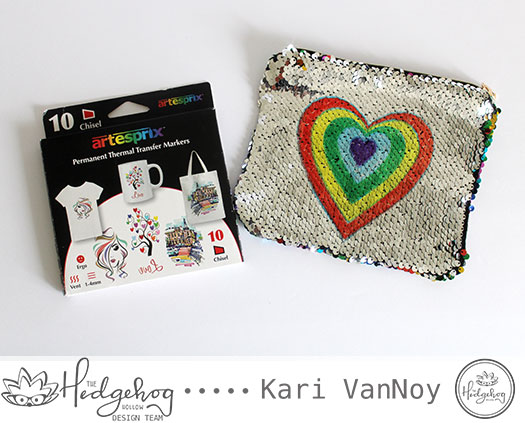
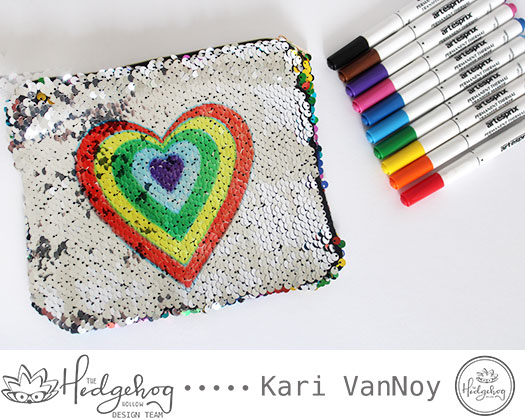
Hello! I have one more project to share using the Artesprix Heat Transfer Markers that came in the Hedgehog Hollow March 2019 kit.

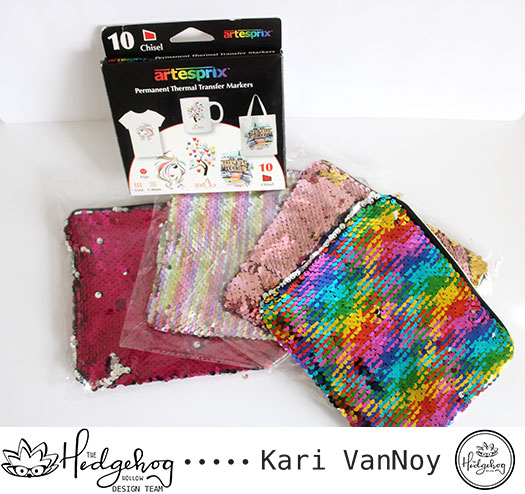
This was a fun one! I just could not wait to try sublimating on sequins!! So I found these pouches and gave it a try.

Check out my video below or on YouTube to see how to do this:

Now, who would’ve thought you could use these markers to heat transfer onto sequins!?!

Will it sublimate?

It worked! And I was surprised and delighted! For the instruction, be sure to watch the video posted above.

If you are interested in the pouches I used, find them here. You can get these markers from The Hedgehog Hollow (in the March 2019 kit).
Thanks for stopping by!

Comments { 0 }
tied-up-with-tulle

How to sew Baby Burp Cloths

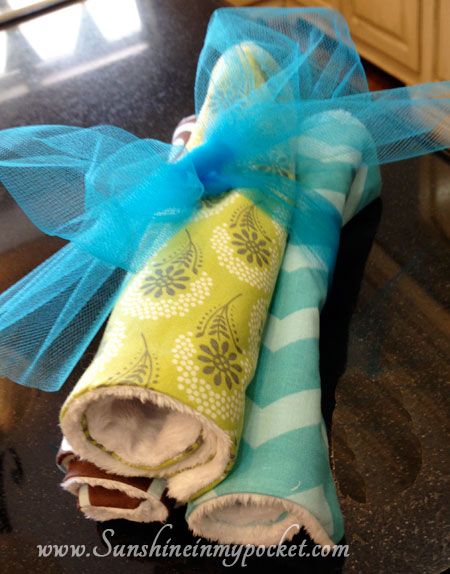
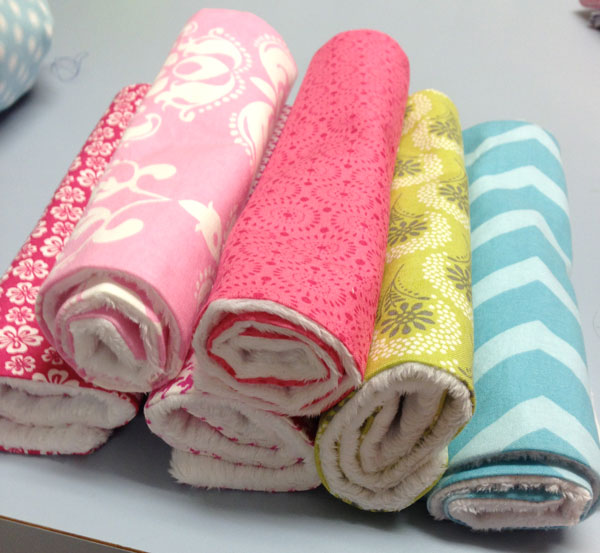
Have you heard?!? I am a grandma!! And when I found out I was going to be a grandma…the first thing I did was go shopping for FABRIC. These Designer Burp Cloths are so soft and beautiful. And every mom needs a stack of them.

stack-of-burp-cloths

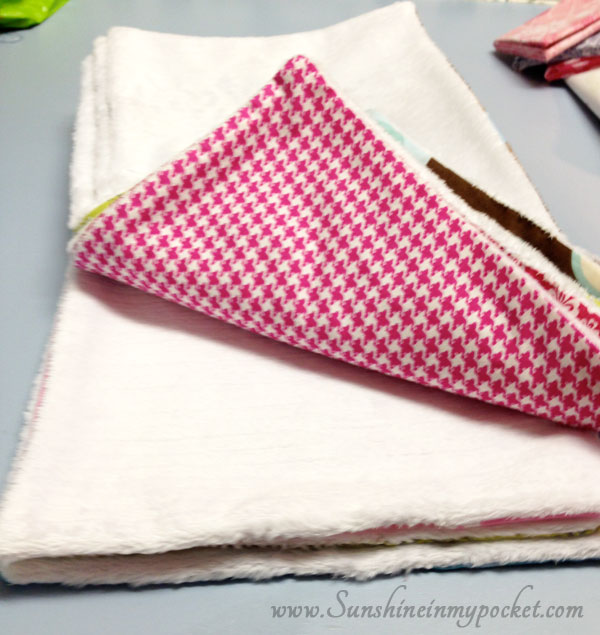
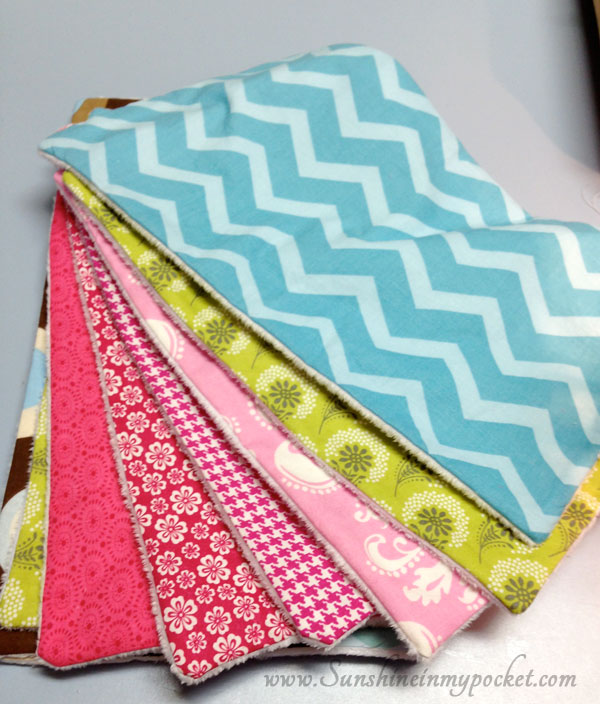
I got all of these fabrics from JoAnn’s. They are thick cotten fabric on one side, and soft white chenille on the other. I whipped up a bunch of these in a single day.

Just look at how soft that chenille is.

the-soft-side-of-cloths

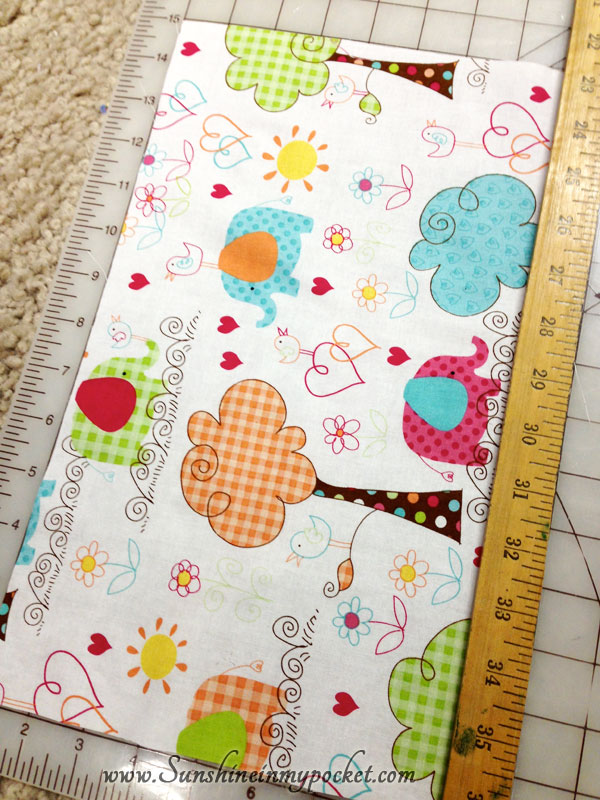
To make your own, just cut out the fabric into rectangles. I made mine about 14″ x 9″. Put right sides together, and sew them up, leaving about 3″ on one side to turn the fabrics right side out. Then iron, and hand stitch the hole closed.

These are just like sewing up the Baby Blanket I shared a while ago, only on a much smaller scale. They are machine washable in cold water…and you KNOW that’s important!

measure-it-out

_fanned-out-cloths

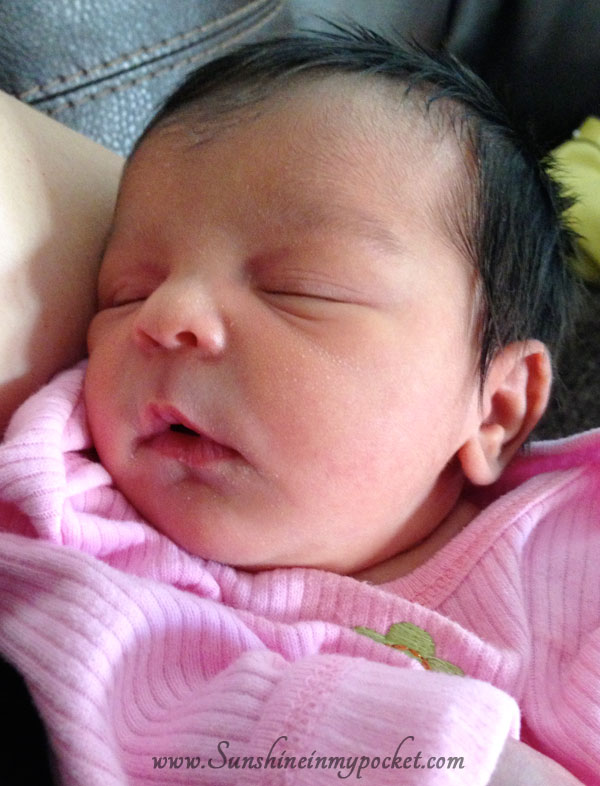
Ok, I just HAVE to share a picture of my new granddaughter:

baby-makaylah

Isn’t she adorable?!? I’m completely in love.

tied-up-with-tulle

Oh, and before I go…these make great baby shower gifts!

Comments { 2 }
baby-blanket-2

Exciting Announcement! And blanket sewing tutorial

I just can’t wait to tell you: I’m going to be a GRANDMA!! I know, I know…it’s pretty hard to believe. But, by the time this posts, I MAY already be a grandma. My daughter went into the hospital last night to be induced.

Oh. my. goodness. So I’ve never been a grandma before, but I imagine that grandmas SEW! So guess what I’ve been doing?

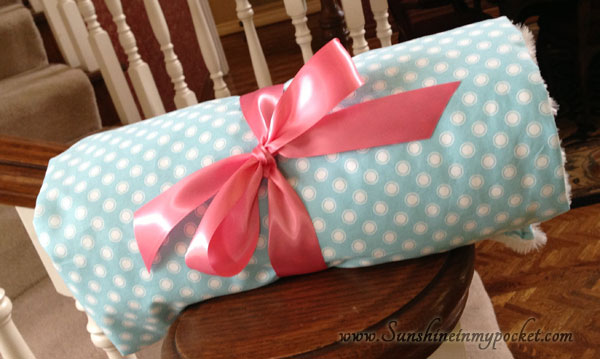
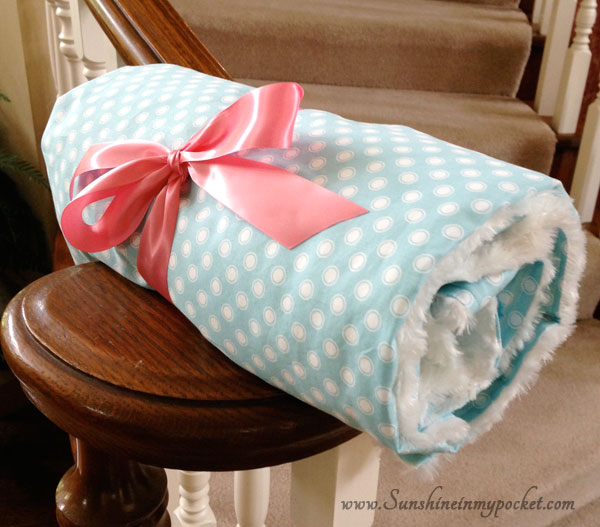
baby-blanket-on-stairs

Sewing! One of the first things I put together is a baby blanket…with a really SOFT minky inside. It’s a simple project to start with, so how could I resist?

Now, notice the PINK ribbon. It’s a girl! But I bought the aqua fabric before I knew 🙂 ….girls like aqua, too.
Here’s how to make one:

You will need —
1 1/4 yd. minky fabric
1 1/4 yd. cotton fabric
matching thread
sewing supplies

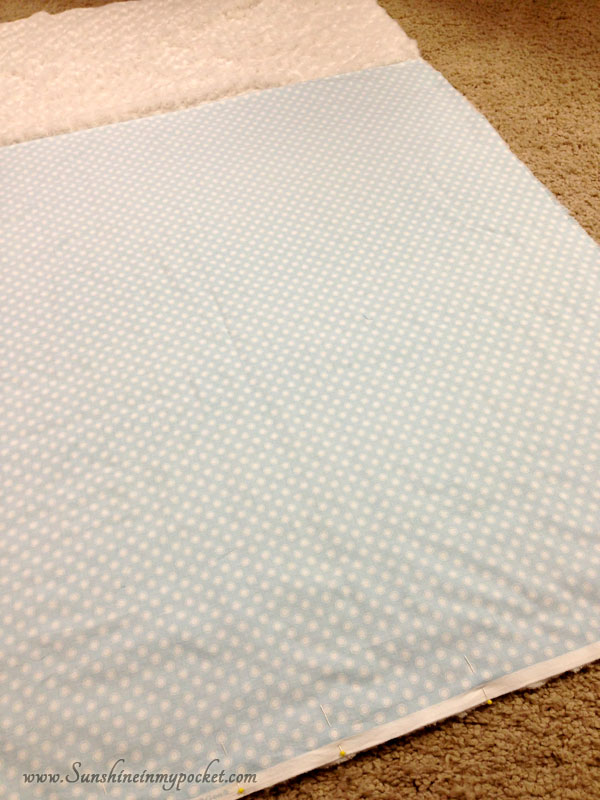
step-one-blanket

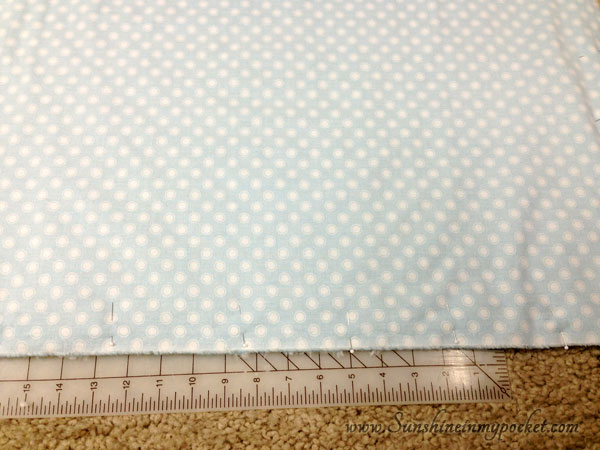
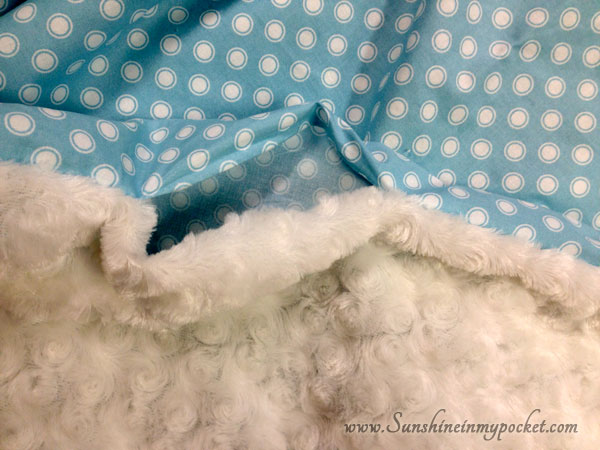
Put the soft fabric on your cutting mat right side up. Place the printed cotton fabric face DOWN on the minky. Trim the minky to the same size as the cotton fabric. Pin all the way around. Sew, leaving a 3 inch hole in order to turn it right side out.

pin-all-way-around

Turn it right side out by pulling the fabric through the unstitched portion:

turn-right-side-out-thru-hole

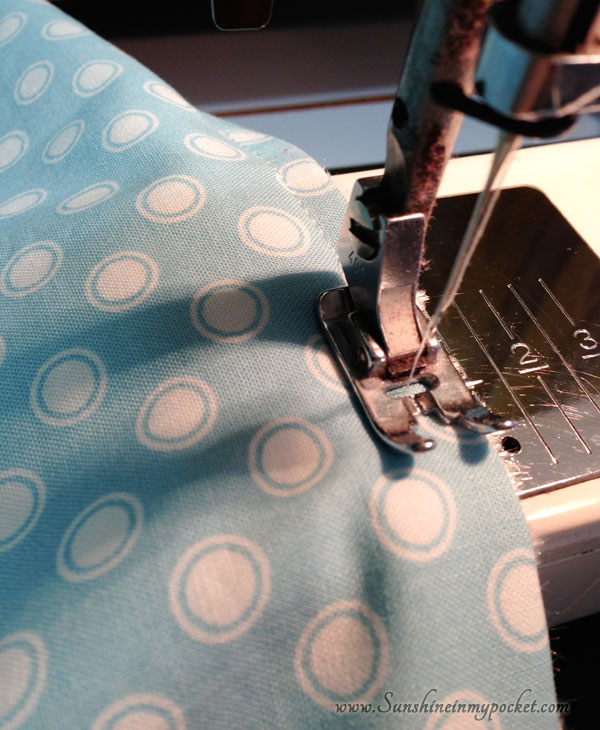
Iron the cotton side of the blanket, turning that edge under 1/4″ to match the stitched portion. Then top stitch, making sure to close up the hole.

top-stitch

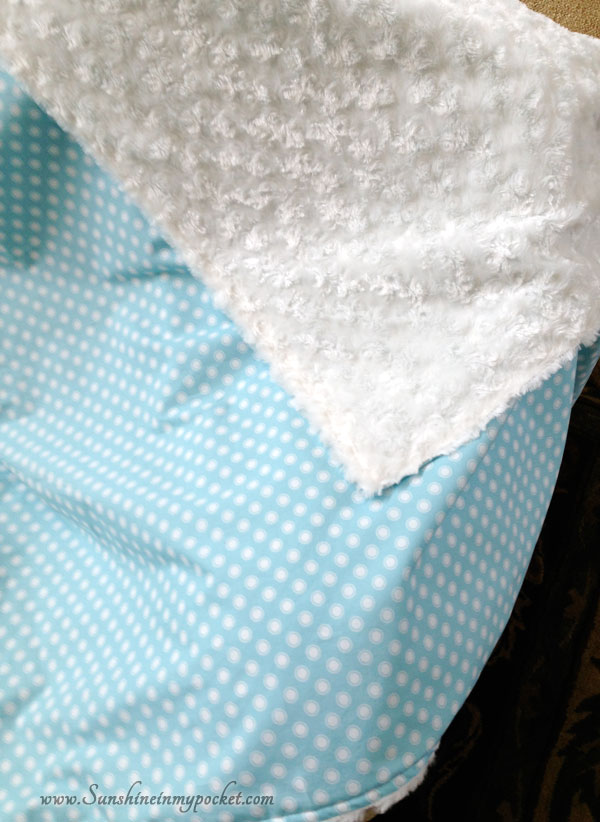
Look how soft and awesome this blanket is:

finished-blanket

Don’t you think it will be perfect for newborn baby pictures?! Can’t wait!

baby-blanket-2

Comments { 2 }
the-last-chocolate-survival-kit

Chocolate Survival Kit

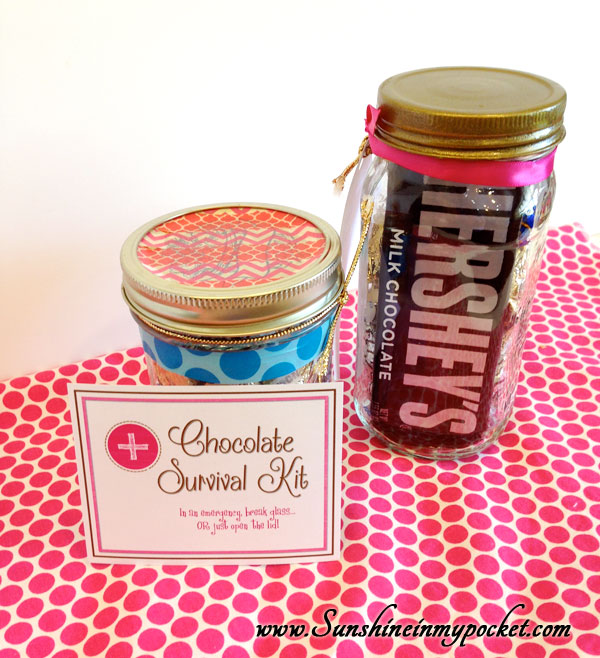
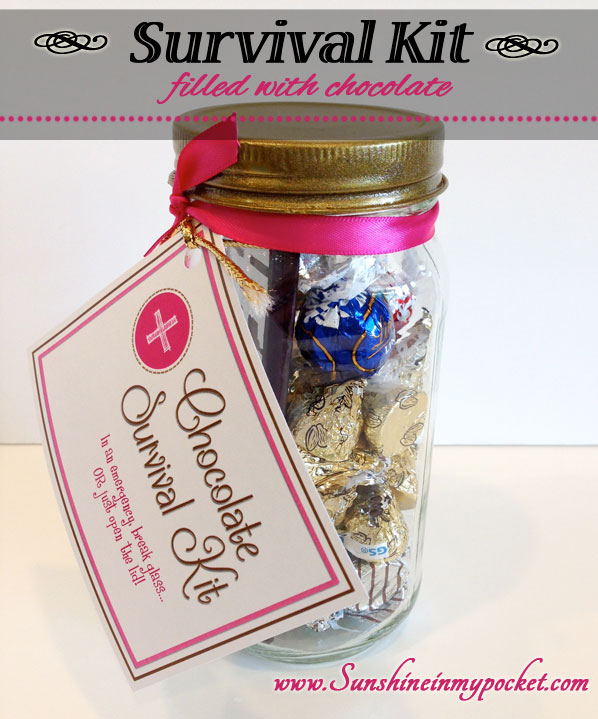
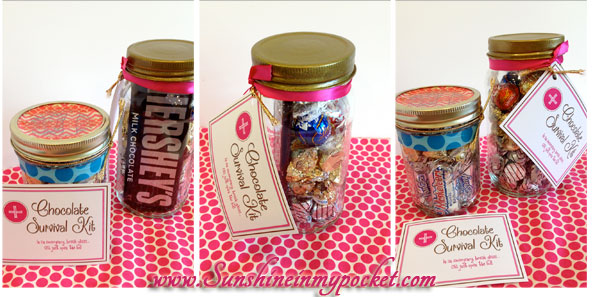
Last week I participated in a PinChat Live party about desserts in jars. It reminded me that I haven’t yet posted about one of my favorite “Survival Kits” in a jar! Here it is:

chocolate-survival-kit

This is the perfect little gift for anyone who is up against some tough trials. When I delivered one last night, my neighbor’s daughter said “EVERYONE needs one of these!” (I wish I could make one for everyone!)

I also made one for my husband, who was in a bicycle accident over the weekend. He loved it and keeps it close to his favorite chair to “help in the recuperation process.” He didn’t even mind that it was pink. 😉

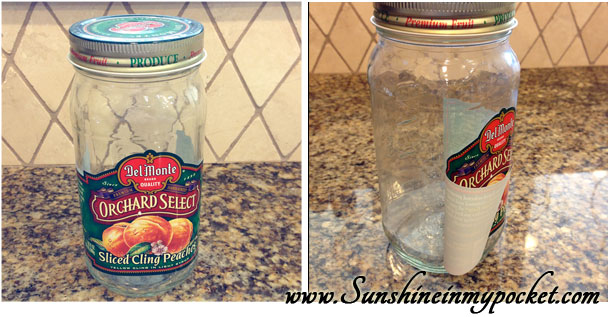
I love that this is a great way to recycle those jars, too. This jar started out as a jar filled with peaches:

peaches-jar

I just peeled off the label and ran it all through the dishwasher. If there is any sticky residue, a little citrus (or lemon) essential oil should take that right off.
See that lid? Nothing a little gold spray paint can’t fix.

Then just fill it up with some of your favorite chocolate, tie a ribbon, attach the note and deliver. Everyone loves it.

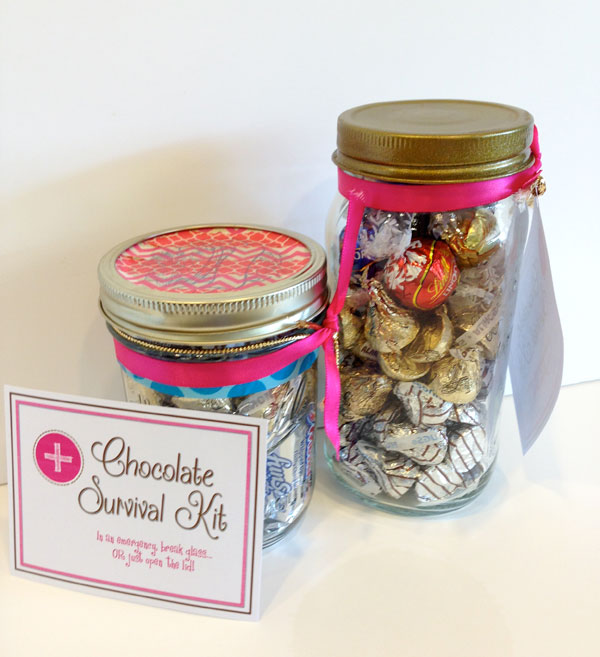
two-survival-kits

A mason jar works well, too! I like to use a little washi tape on the lid, but fabric looks great, too.

trio-of-kits

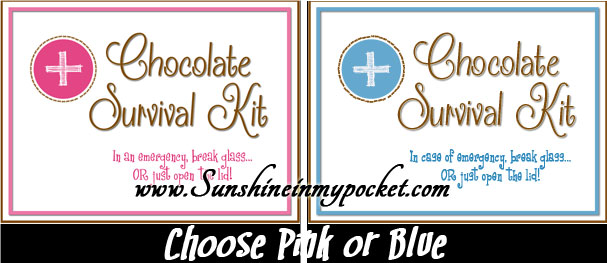
I’m thinking this little note would look good in blue, what do you think?

choose-pink-or-blue

If you’d like the printable, like my page first here:

Then download the printable here:

8-13 chocolate survival kit pink

8-13 chocolate survival kit blue

Before I go, I just want to thank my neighbors the WHITINGS for bring me an entire giant container of chocolate…and they didn’t even know that it was just what I needed! 🙂 (You guys are the best!)

So you see, you never know who just might need a survival kit filled with chocolate. If you do give out a kit or two, please let me know. I’d love to hear!

the-last-chocolate-survival-kit

Comments { 0 }