Well believe me, I cried* plenty over this one. And because of my anguish, I wanted to share my findings with YOU so you don’t have to experience the same trials. (Ok, trial might be too strong a word….let’s replace that with FRUSTRATION.)
Spilled Milk, the Making of:
I found this fantastic blog post about DIY spilled milk for April Fool’s Day. As you might know, I’m having some very serious people over on April Fools and I must make them laugh. 🙂
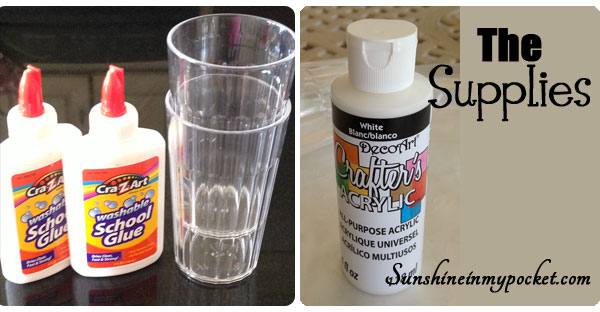
So, in my haste to get these beauties made, I gathered all my supplies from WalMart: Plastic Glasses (2 for 88 cents!), Glue (at only 33 cents per bottle!), and a little white acrylic paint. I was a little more than excited because this was going to be the cheapest most inexpensive craft ever!
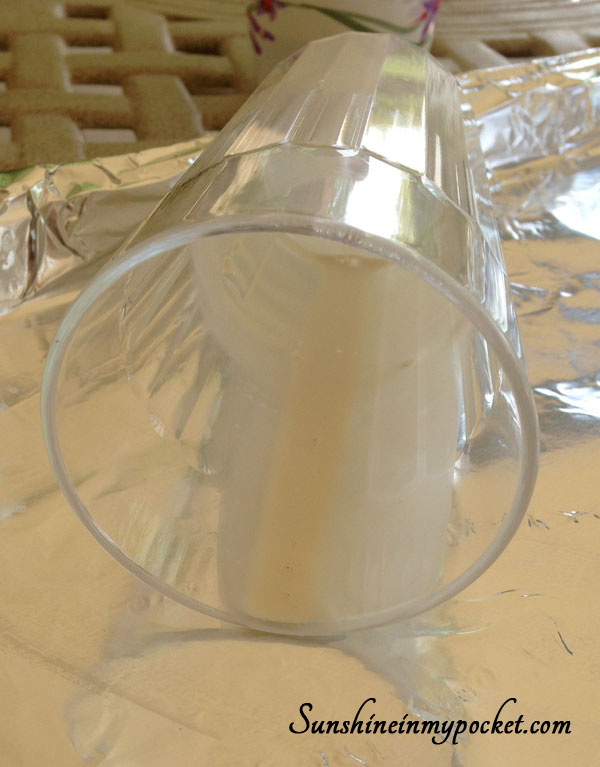
I started out by making the milk “residue” inside the glass. Take 1 part glue, 1 part white paint, and 5 parts water. Stir it all up and pour it carefully into a glass. Swish it around a bit, then pour it back out of the glass. Set the glass on it’s side and allow it to dry.
So far so good!
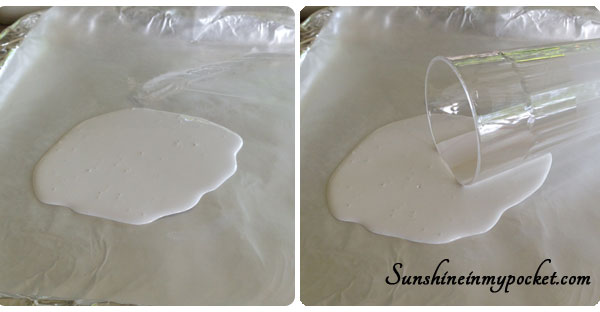
After it dried, I made the “milk spill” by mixing equal parts of paint and glue. Stir well. Pour a splotch of the mixture onto waxed paper and put the glass into the splotch, as pictured below.
Easy enough, right. Allow this to dry. I let the first batch dry for 2 days. (I only made 2 glasses the first round, but my intention was to make 12 glasses of spilled milk to use at each place setting for the dinner party). When I went to check on the dried, spilled milk, I found this:
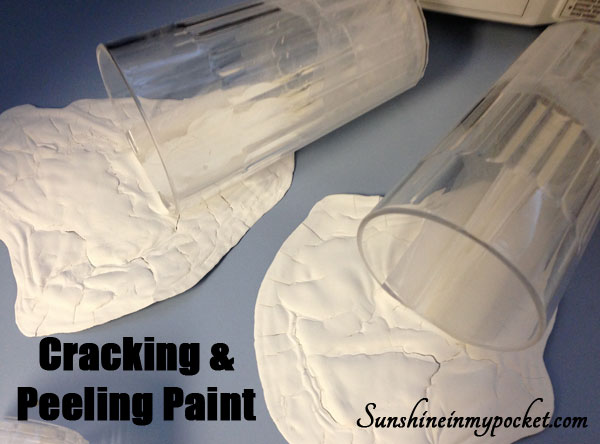
It didn’t look like spilled milk at all. It looked like dried paint…and when I peeled off the waxed paper, they actually started to tear at each cracked area. It looked TERRIBLE!
Good thing I started early, I thought. So I made another batch. This time, I had to use all the rest of the glasses (10) because I only had 2 days until the party.
I mixed much less paint this time. Just enough to tint the glue a nice milky white color. Then I let them dry. I checked on them periodically and they seemed like they were doing much better. However, they were taking MUCH longer to dry.
I turned the ceiling fans on to help them along.
When they were finally dry enough to peel from the waxed paper, here’s what I got:
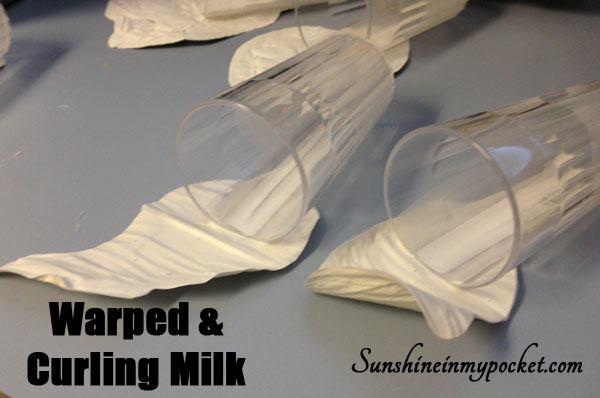
The “milk” was warped and curling by the minute! That didn’t look very realistic! I was sad and a little frantic. These were to be a main part of my April Fools Jokes. I didn’t have time to make more.
So I did what any self-respecting crafter would do. I IMPROVISED!
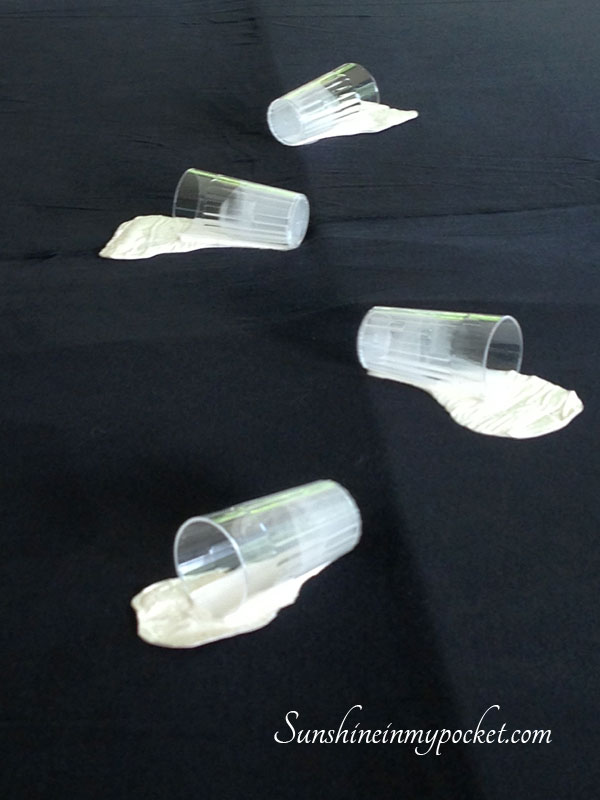
I took that warped and curling milk and I glued it down with glue dots to some white cardstock. Then I cut around the cardstock. And by gosh, it worked! I ended up only prepping 5 glasses of milk this way, but I think the table turned out great! I used them as a sort of centerpiece:
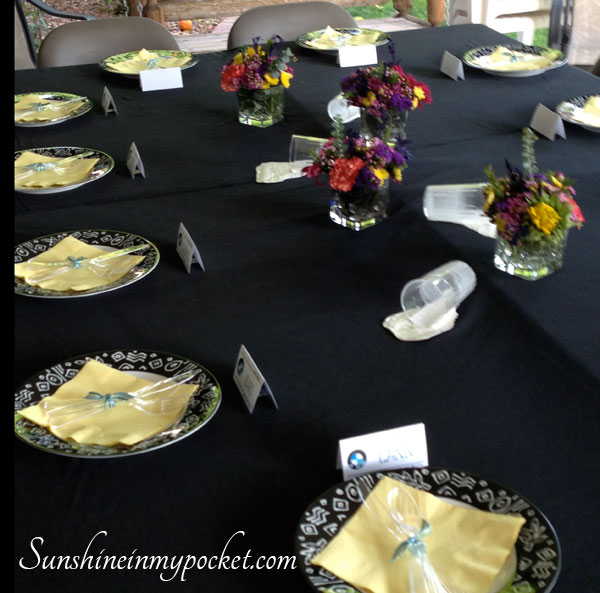
And, even with all the issues, I think in the end they looked realistic enough. I even had someone who saw the “spilled milk” and wanted to CLEAN IT UP! Yes, it’s reactions like that to make it all worth while! 🙂
So my advice to you if you are making these beauties, is take enough time to find the ratio that works! And if you do find that magic ratio, please let me know so I can share!
I hope this posting helped you in some small way! Happy Joking!


Comments are closed.